
Revealing Multiple Content on Scroll Using JavaScript's Intersection Observer
A Beginner's Guide to Observing and controlling Multiple Elements.


In this article, we would continue our discussion on JavaScript's Intersection Observer API and how we could easily use it to observe multiple elements in the DOM, revealing each as they come into view. As this is the second part of a two-series article, it is mandatory that you've read the first part of the Intersection Observer series titled Revealing Contents on Scroll Using JavaScript’s Intersection Observer API. It is the foundation from which this article is built on and the core essential basics of the Intersection Observer has been thoroughly covered in that article.
Prerequisites
- Basic knowledge of JavaScript (beginner level is perfectly fine as I'd explain everything in great details like I was explaining to a 5-year-old. :)
- Basic knowledge of HTML and CSS (you've built at least one basic webpage with them).
- A code editor (VS Code recommended).
- A browser of course (Chrome or Firefox recommended).
- You've read the first article of the series, or at least have a basic understanding of the Intersection Observer. 👇
Creating a Basic HTML/CSS Page
As with the previous article, we’ll start by creating a simple HTML page with a hero header section and a title inside of it. Then below the header, we'll create 3 sections and for each section, we will create a title and a content box with two columns inside it. Each column would have an image inside (one in the left column and the other in the right column). The idea is as we approach each section, the columns would slide in with the image in them from their respective sides i.e the one on the left would come in from the left side of the viewport, while the one on the right would come in from the right. So let's dive into the HTML.
  <body>
    <!-- Header -->
    <header>
      <h1>Just a Header</h1>
      <h3>Scroll to Reveal Content</h3>
    </header>

    <!--Section 1 -->
    <section class="section-1">
      <h2>Section 1</h2>
      <div class="content">
        <div class="left-column">
          <img class="img" src="img/image1.jpg"/>
        </div>
        <div class="right-column">
          <img class="img" src="img/image2.jpg"/>
        </div>
      </div>
    </section>

    <!--Section 2 -->
    <section class="section-2">
      <h2>Section 2</h2>
      <div class="content">
        <div class="left-column">
          <img class="img" src="img/image3.jpg"/>
        </div>
        <div class="right-column">
          <img class="img" src="img/image4.jpg"/>
        </div>
      </div>
    </section>

    <!-- Section 2 -->
    <section class="section-3">
      <h2>Section 3</h2>
      <div class="content">
        <div class="left-column">
          <img class="img" src="img/image5.jpg"/>
        </div>
        <div class="right-column">
          <img class="img" src="img/image6.jpg"/>
        </div>
      </div>
    </section>
  </body>
Now for the CSS, we'll give the header and each section a height of 100vh, align the title text to the center, then set the content box to a 2-column view (each column taking 50% of the viewport's width) and vertically centring everything using flexbox. We'll then set each image to a block element, give the images a fixed responsive width and then using margin:auto to horizontally centre each in their respective column. Now to add a bit of aesthetics to our design, we'll apply a gradient background colour to each section to separate them, import a decent font from Google font and then add a bit of polaroid depth to the images using box-shadow. Lastly, we will create two hidden classes (hidden-left and hidden-right) that would be responsible for hiding and revealing each content's column later on using JavaScript and apply a transition effect on each column.
@import url("https://fonts.googleapis.com/css2?family=Nunito:wght@400;800&display=swap");

* {
  margin: 0;
  padding: 0;
  box-sizing: border-box;
}

h1, h2, h3 {
  text-align: center;
  margin-bottom: 3rem;
  color: #222;
  text-align: center;
  font-family: "Nunito", sans-serif;
}

h1 {
  font-size: 4rem;
  font-weight: 800;
}

h2 {
  margin-bottom: 5rem;
  font-size: 3rem;
}

h3 { font-size: 2rem;}

.img {
  width: 95%;
  max-width: 550px;
  display: block;
  margin: 0 auto;
  border-radius: 6px;
  box-shadow: 2px 2px 8px rgba(0, 0, 0, 0.5);
}

section, header {
  height: 100vh;
  display: flex;
  flex-direction: column;
  justify-content: center;
  background: #fdfbfb;
  background-image: linear-gradient(120deg, #fdfbfb 0%, #ebedee 100%);
  overflow: hidden;
}

.section-2, header {
  background: #ebedee;
  background-image: linear-gradient(135deg, #f5f7fa 0%, #cfd4dd 100%);
}

.content {
  display: flex;
}

.content > div {
  width: 50%;
}

.hidden-left {
  opacity: 0;
  transform: translateX(-100%);
}

.hidden-right {
  opacity: 0;
  transform: translateX(100%);
}

.left-column {
  transition: all 1.5s ease-in-out;
}
.right-column {
  transition: all 1.5s ease-in-out;
}
The resulting layout👇
Great, we have our basic webpage set up, now let's dive into JavaScript and talk about how we can observe each section using the Intersection Observer.
Implementing the Intersection Observer API on Multiple Elements
Recall from the previous article that the steps for observing an element are as follows:
- Select the target element you wish to observe
section. - Define an
optionsobject with your customisation options for the Intersection. - Create the actual
Observerusing its object constructor function and pass it a callback function and the options objectnew IntersectionObserver(callback, options). - Pass the target element to be observed to the
Observerusing the observe methodObserver.observe(section). - Finally, define the
callbackfunction with the desired Intersection behaviour.
That's it! If you can vividly remember these steps above then we can begin our implementation of the observer on multiple sections, but if you can't recall exactly what we did previously, you're advised to quickly go read up the part one before continuing past here.
Note: The Intersection Observer can accept only one element for observation at a time. This means if you need to observe multiple elements you'd have to iterate (loop) over all of them and observe each of them separately:
Now let's begin, we'll start by selecting all 3 sections that we wish to observe.
const allSections = document.querySelectorAll("section");
This selector returns a Nodelist containing all 3 sections in our webpage
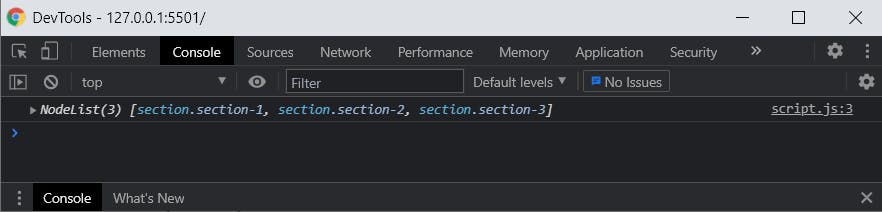
Note: A NodeList is simply a collection of elements in the DOM that is stored in what looks like an array, and although it isn't an array, we can loop through a NodeList like actual arrays.
Next, we will define the options object needed to customize the Intersection. We will set the root element as the browser null, then set the threshold to 0.3 i.e the callback should be fired when 30% of the target section comes into view. We won't specify any rootMargin as we have no need for it, we only used it previously to discuss its use case.
const options = {
    root: null,
    threshold: 0.3,
  }
With that out of the way, we can finally create an observer using its default constructor function and then pass it a callback function and the options object.
const sectionObserver = new IntersectionObserver(callback, options);
Finally, we have to tell the sectionObserver what it should observe in the DOM by passing the element to the observer. But since we are interested in multiple elements that we previously stored in a NodeList, we simply have to loop through this NodeList and for each iteration (loop), we pass each section element to the observer. By the end of the loop, all 3 sections would be under observation.
allSections.forEach(section => {
  sectionObserver.observe(section);
});
Let's go through what we just did. We first selected the target sections to be observed and stored them in a NodeList allSection, then we created an actual observer sectionObserver, and finally we told the observer what to observe by looping through the allSection NodeList using a forEach() method and then we passed each target section to be observed into the observer using the observe() method. That's it, we have everything set up, the only thing left now is defining our callback function to be executed.
Important Detail
Recall from the previous article that the observer always fires the callback function once when our webpage loads for the first time? Well, that "once" only applies to when you are observing a single element, but when you're observing multiple elements the callback gets fired once for each element under observation. This does not mean there is an actual Intersection, but the elements are simply getting registered by the observer. If we consoled log the entries in our callback, we'd get the array of each element's entry that was fired.
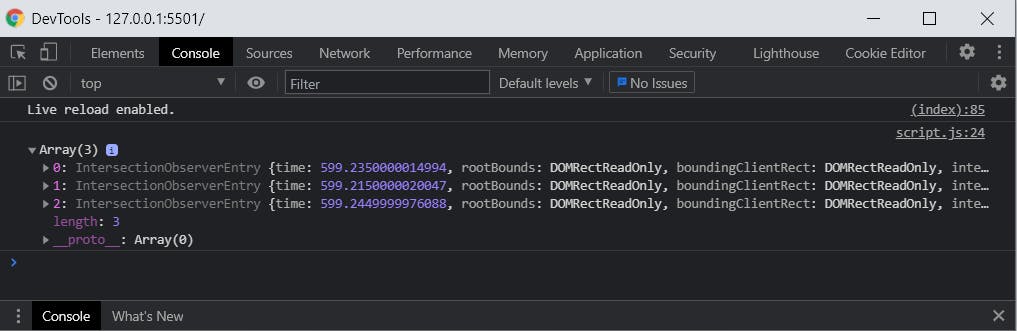 This can be very confusing for most beginners and trigger the wrong behaviour in their code if not properly guarded or written.
Now that we have the observer set up, let's hide all the content (columns) that we wish to reveal on Intersection by adding the hidden classes to them and then writing a callback function that removes these hidden classes on Intersection. We could have simply added the classes manually in our HTML, but that's bad practice as a user's browser might have JavaScript turned off, which would result in our webpage not displaying any content as JavaScript wouldn't be able to remove the hidden classes.
document.querySelectorAll(".left-column").forEach(column => {
  column.classList.add("hidden-left");
})
document.querySelectorAll(".right-column").forEach(column => {
  column.classList.add("hidden-right");
})
What did we just do? We simply selected all the columns on the left and then looped through them using forEach() and then added the hidden-left class to each column. Then we did the same exact thing for the right columns using the hidden-right class.
The Callback Function
We can now define the callback function, but before getting into that I'd like to talk about something I did not get to cover in the previous article and that's how to un-observe (stop observing) a target element after its Intersection. Now you might be wondering why you'd want to stop observing a target element after an Intersection? Well, let's take a cursory look at the behaviour of the webpage from the previous article.

Notice that the image content keeps sliding in as it comes into view and then sliding back out as we scroll out of view, which means the callback function keeps firing over and over again for as long as the user keeps scrolling on the webpage. We might not always want this behaviour as we might simply want the content to reveal itself once it comes into view and nothing more (it should remain visible even if we scroll out of view).
For this, the observer has an .unobserve() method that can be used to un-observe a target element, but to be able to use this method, we'd have to pass the actual observer that is firing the callback function to this same callback function as a second argument. Recall that the callback function by default receives an entries array when the callback function is fired by the Observer? Well, that's not the only thing that the callback function can receive, the observer itself can be passed to it as a second argument so we can un-observe an element with it. With that in mind, let's create our callback function before going over it line by line.
function callback(entries, observer) {
  const [entry] = entries;

  if (!entry.isIntersecting) return;

  //   get the class name of the target section that came into view
  const curSectionsName = entry.target.getAttribute("class");

  //   now target that specific section
  const curSection = document.querySelector(`.${curSectionsName}`);

 //   remove the hidden classes (DOM traversing)
  curSection.lastElementChild.firstElementChild.classList.remove("hidden-left");
  curSection.lastElementChild.lastElementChild.classList.remove("hidden-right");

  observer.unobserve(entry.target);
}
Now let's dissect the callback function line by line.
const [entry] = entries;
Again, recall that the Observer passes an entries array to the callback containing an IntersectionObserverEntry object? We simply deconstructed (extracted the object in) the array and stored it in anentryvariable to make it easier to directly access the properties stored in that object.if (!entry.isIntersecting) return;
This line of code is considered a guard. Because the callback is fired for each observed section by default, we only want to do something (run the code below this line) when there is an actual intersection (i.e whenisIntersectingistrue), we are currently checking to see if there is afalseIntersection and if that is the case, we want the function to terminate itself (to simply return without running any of the code below this line of code). Consider it a body-guard if you would.const curSectionsName = entry.target.getAttribute("class");
We simply check thetargetproperty in theentryobject for the exact section that came into view (that has intersected with the viewport), then we take its class name and store it in a variablecurSectionsName.const curSection = document.querySelector(`.${curSectionsName}`);
Because we previously only fetched the class name of the section that came into view, this line simply targets that exact section in the DOM using the query selector and then we passed the current sections class name stored incurSectionsNameto the selector (we used template strings to pass that variable into our selector). Then we stored the current section incurSection.curSection.lastElementChild.firstElementChild.classList.remove("hidden-left");
Now that we have the section in view, we do not want to do anything with the section itself, but the two columns inside it. But do you recall from our HTML that we put both columns in acontentcontainer? So we have to traverse the DOM (move around in the DOM) to grab them. Let's take a quick look at the logic (for beginners)curSection: Recall that this is the current section in the viewport..lastElementChild: Because each section has ah2text and acontentcontainer as children, we simply target the last child i.e thecontentelement..firstElementChild: Now that we have access to thecontentcontainer holding both columns, we use this line selector to targets the first columnleft-columnin the content element as it is the first element in the container..classList.remove("hidden-left"): Then we simply check the classList of this column and remove the hidden class we previously added to it. That's it, we simply repeat the exact same thing for the right column in the next line of code.
observer.unobserve(entry.target): Recall that while defining the callback function, we passed the observer firing this same function as a second argument to the function itself? As a result our callback now has access to the Observer firing it. We simply tell the observer to stop observing the target section that came into view after its content has been revealed.
That's all, our webpage should now behave as expected.
As you can see, once we scroll towards each observed section, once 30% of the section comes into view in our viewport an Intersection is triggered and the callback is fired. The hidden classes get removed and the columns are revealed as they slide back into their original position. Then the Observer stops observing that section.
Conclusion
Congrats!!!🎉 You have successfully learnt how to observe multiple elements in the DOM using the Intersection Observer, how to reveal multiple contents while scrolling the webpage and how to un-observe an element after an Intersection.
Buy me a coffee☕
If you liked my article and found it helpful, you can buy me a coffee using any of the links below.👇
Also, do well to leave a reaction and follow me for more awesome contents, and if you've got any questions or spotted any errors, please do well to leave feedback. Thanks for reading.